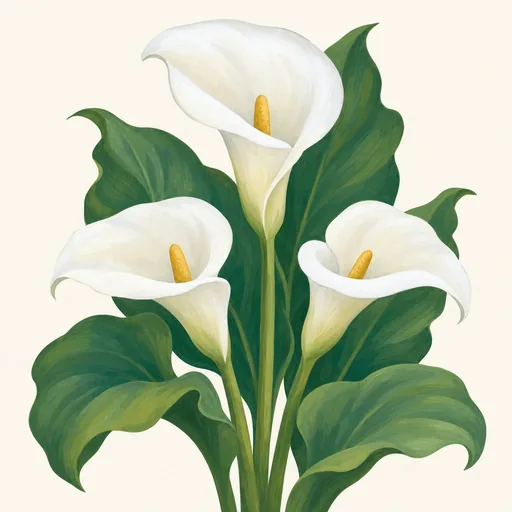
Calla Lily
Zantedeschia aethiopica · Araceae
- Plant out1–3 weeks after the last frostApr 17 – May 7
- Space30–45 cm (12–18 in) apart
- Bloom60–90 days after plantingJun 16 – Aug 26
Description
Calla lily is a perennial flowering plant grown for its elegant white blooms and lush, arrow-shaped leaves. Despite its name, it is not a true lily. What looks like a single large petal is a spathe: a modified leaf that surrounds the upright, yellow spadix, where the plant’s many tiny flowers are clustered. The spathe is usually white, sometimes with a greenish tint, and can remain attractive for several weeks. The glossy green leaves rise on long stalks from thick underground rhizomes, forming clumps that can reach roughly 60–120 cm tall.
Native to southern Africa, calla lily often grows near streams, marshes, and other damp places. In gardens, it prefers rich soil that stays consistently moist, though established plants can tolerate brief drier periods. It flowers best with sun or partial shade; in hot climates, afternoon shade helps protect the leaves. Where winters are mild, the foliage may persist year-round. In colder regions, frost can damage the leaves, and the rhizomes may need to be lifted and stored indoors or grown in containers that can be moved under cover.
Calla lily is popular beside ponds, in moist borders, and as a cut flower. It can spread into sizable colonies where conditions suit it, so gardeners should check local guidance before planting it near natural waterways. After flowering, the spadix may develop a cluster of berries. All parts of the plant contain calcium oxalate crystals and are harmful if chewed or swallowed by people or pets; the sap may also irritate sensitive skin. Colored flowers sold as “calla lilies” often come from other Zantedeschia species or hybrids rather than this predominantly white-flowered species.
Growing Conditions
30–90 cm (1–3 ft) tall, 30–60 cm (12–24 in) wide
- Smallest
- Largest
Part sun, 4+ hours
Tolerates full sun, part shade, bright indirect light
Moderate
Keep evenly moist, not soggy.
Ideal 16–25 °C (61–77 °F)
Survives down to −10 °C (14 °F).
pH 6–7 · acidic to neutral
Where it Grows
Planting
When to Plant
Plant calla lily rhizomes outdoors in spring, after the last frost has passed and the soil has warmed to about 60°F (16°C). A useful sign is that you can work the soil without finding it cold and waterlogged, and nights are reliably frost-free. In areas with cold winters, don’t plant just because the first warm days have arrived: new growth is vulnerable to frost, and rhizomes can rot in cold, wet ground. For a head start, plant them in pots indoors about six to eight weeks before your area’s last expected frost, then move them outside after the danger of frost has passed. In climates with mild, frost-free winters, calla lilies can also be planted in autumn for spring growth. Timing varies with the type: the familiar white calla lily often grows during the cooler, wetter season in mild climates, while many colorful hybrids are usually planted for summer flowering.
How to Plant
Choose a spot with rich soil that holds some moisture but drains well. Calla lilies grow well in full sun in cooler areas; give them afternoon shade where summers are hot. Work compost into the planting area, and avoid a site where water pools after rain. The white calla lily (Zantedeschia aethiopica) tolerates wetter ground than most colorful hybrid callas, which are particularly prone to rot in soggy soil.
Set each rhizome with its buds or growing points facing upward, about 3 to 4 inches (7 to 10 cm) below the soil surface. Space rhizomes roughly 12 to 18 inches (30 to 45 cm) apart so the leaves have room to spread. Cover them gently and water to settle the soil. Keep it lightly moist while shoots emerge; once plants are growing, water regularly enough that the soil does not dry out completely, without leaving it saturated.
For containers, use a pot with drainage holes and a good-quality potting mix. A pot about 10 to 12 inches (25 to 30 cm) wide can hold one rhizome. Plant it at the same depth as in the ground, and empty any water that collects in a saucer. In frost-prone areas, wait until the weather is warm before setting the pot outdoors.
Growth Timeline
- Growing in the garden 60–90 days
- In bloom 4–8 weeks
Planting Calendar
- Plant outdoors: 1–3 weeks after the last frost
- Plant out: Apr 17 – May 7
- Bloom: Jun 16 – Aug 26
Care
Care Calendar
- Feed · Apr 24 – Jul 9
Feed lightly every few weeks while leaves and flowers are growing. - Deadhead · May 8 – Aug 6
Cut spent flower stems near their base. - Lift and store · Oct 25 – Nov 14
Where the ground freezes, lift rhizomes after a light frost and store them dry and frost-free. - Mulch · Oct 25 – Nov 14
Where callas can overwinter outdoors, cover the planting area with mulch.
Watering
Keep the soil evenly moist while calla lilies are actively growing and flowering. Water when the top 1 inch (2–3 cm) begins to feel dry, soaking the soil thoroughly rather than giving frequent light sprinkles. Check container plants more often: pots can dry quickly, but they must have drainage holes so the rhizomes do not sit in water. Calla lilies grown from colorful hybrids generally need moist, well-drained soil; white Zantedeschia aethiopica tolerates wetter conditions. Water at soil level when possible to keep foliage dry. After flowering, let the leaves continue growing, then gradually reduce watering as they yellow and the plant enters dormancy. Keep dormant rhizomes nearly dry, whether they remain in a pot or are lifted for storage. Resume watering when new growth appears.
Pruning
Remove spent flower stalks by cutting them near the base with clean, sharp pruners. This tidies the plant and prevents it from spending energy on seed production unless you intend to collect seed. Snip off leaves that have yellowed or become damaged, but leave healthy green foliage in place after flowering: it feeds the rhizome for the next growing season. As the plant enters dormancy, wait until the leaves have yellowed and died back before clearing them away. Disinfect tools before working on another plant, particularly if you see soft, discolored, or rotting tissue. Calla lilies do not need shaping or routine hard pruning. If you grow them for cut flowers, remove individual stalks as they reach the stage you want rather than cutting back the whole plant.
Weeding
Keep the area around calla lilies free of weeds, especially while new shoots are emerging. Weeds compete for moisture and nutrients, and dense growth around the stems can reduce airflow. Pull small weeds by hand when the soil is damp, holding nearby soil steady so you do not disturb the calla lily rhizomes. For larger weeds, loosen their roots carefully with a hand tool rather than digging deeply around the plant. Check beds regularly: removing weeds before they flower or set seed is easier than clearing an established patch. In pots, remove volunteer seedlings as soon as you notice them. Once the calla lilies are growing strongly, a modest mulch layer can help suppress new weeds, but keep it clear of the stems to avoid trapping excess moisture there.
Mulching
Spread a 1–2 inch (2–5 cm) layer of compost, shredded leaves, or fine bark around calla lilies in garden beds. Mulch helps the soil retain moisture and limits weed growth, both useful during active growth. Leave a small gap around stems and emerging shoots so damp material does not rest against them. Do not bury the crown or add so much mulch that the soil stays soggy; drainage is particularly important for colorful calla lily hybrids. Refresh the layer as it breaks down, and check beneath it before watering rather than assuming the soil is dry. In cold regions, mulch alone may not protect rhizomes through winter. Where calla lilies are not reliably hardy, lift and store dormant rhizomes or move container plants to a frost-free place instead of relying on a thick winter covering.
Fertilizing
Before planting, mix compost into the soil if it is poor, while preserving good drainage. During active growth, apply a balanced fertilizer according to the label; a diluted liquid feed every four to six weeks is a practical option for container plants. Water the soil before applying fertilizer if it is dry, and avoid getting concentrated product on leaves or shoots. Do not overfeed: excessive nitrogen can encourage lush leaves at the expense of flowers. If plants grow well in reasonably fertile garden soil, they may need little additional fertilizer. Stop feeding as flowering ends and the foliage begins to yellow, allowing the plant to enter dormancy naturally. Do not fertilize dormant rhizomes. When growth resumes the following season, start feeding again only after leaves have appeared.
Pest Management
Inspect leaves, shoots, and flower stalks regularly. Slugs and snails may chew tender growth; hand-pick them or use a slug bait labeled for use around ornamental plants, following its directions. Aphids, thrips, and spider mites can occur, particularly on stressed plants. Rinse light infestations from leaves with water, or use an insecticidal soap labeled for the pest and plant, testing a small area first. Good spacing and prompt removal of dead foliage help reduce problems. Watch for soft, foul-smelling rhizomes or collapsing stems, which can indicate bacterial soft rot. Remove badly affected plants and discard them rather than composting them. Prevent rot by using healthy rhizomes, clean tools, and well-drained soil, and by avoiding overwatering during dormancy. Calla lilies are poisonous if eaten, so keep them away from pets and children.
Harvesting
For cut flowers, choose stalks once the colorful spathe has opened and the central spadix is visible. Cut in the cool part of the day with a clean, sharp knife or pruners, leaving healthy leaves on the plant to nourish the rhizome. Put stems into clean water promptly and remove any leaves that would sit below the waterline. Change the vase water regularly and keep the arrangement out of strong sun and heat. If you need to lift rhizomes for winter storage, wait until the foliage has yellowed after flowering; in frost-prone areas, lift them before the ground freezes. Brush off loose soil, let the rhizomes dry in a sheltered, airy place, and store them in a cool, frost-free location. Inspect stored rhizomes occasionally and discard any that become soft or rotten.
Growing in Containers
Grows well in a pot of at least 5 litres (1.3 US gallons), with drainage holes. Can be grown indoors as a houseplant.
Propagation
By division
- Wait until the foliage dies back or new growth begins.
- Lift the rhizome and brush off loose soil.
- Cut it into sections, leaving at least one growing bud on each.
- Replant the sections at their original depth in moist, well-drained soil.
Companion Plants
Good neighbors
- Hostas: They share calla lilies’ preference for moist soil and partial shade.
- Ferns: Many garden ferns grow alongside calla lilies in moist, partly shaded beds.
Common Problems
- Yellowing leaves
- Sticky residue on leaves
- Black sooty coating
- Curled or cupped leaves
Aphids are small, soft-bodied insects that feed by piercing plants and drawing out sap. The group includes many…
- Pale speckles or stippling
- Yellowing leaves
- Brown or crispy leaf edges
- Fine webbing
Spider mites are tiny, plant-feeding arachnids in the family Tetranychidae, not insects. Several species attack garden…
- Holes in leaves
- Slime trails
- Stems chewed or cut through
Slugs and snails are soft-bodied mollusks that feed on many garden plants. Snails carry a visible shell; most slugs…
- Yellowing leaves
- Wilting
- Stunted growth
- Leaves dropping
Root rot is a general name for the decay of plant roots, not a single disease with one scientific name. It can result…
- Root rot and soft rot: Waterlogged soil can cause yellowing, wilting, and mushy roots or rhizomes. Use well-draining soil and avoid leaving pots in standing water.
- Leaf spots: Fungal or bacterial infections can cause brown patches, especially when foliage stays wet. Remove affected leaves and improve airflow.
- Aphids, thrips, and spider mites: These pests may distort new growth or leave stippling on leaves. Check leaf undersides regularly.
- Few or no blooms: Too little light or excessive nitrogen fertilizer can favor leaves over flowers.
- Yellowing leaves: This can signal overwatering, but it may also be normal as the plant enters dormancy after flowering.
Varieties
Its broad white spathes have conspicuous green markings.
- white and green
- large flowers
Deep purple centers contrast with creamy white spathe edges.
- purple and white
- cut flower
Its very dark spathes pair with pale-speckled leaves.
- dark burgundy
- spotted foliage
Warm orange spathes make it a colorful choice for containers.
- orange
- compact
White spathes develop a soft pink flush as they age.
- white
- pink blush
Its yellow spathes develop vivid orange-red tones.
- yellow and orange
- compact
More about varieties
- Zantedeschia aethiopica: The classic white calla lily, with large white spathes and yellow flower spikes.
- Zantedeschia rehmannii: A smaller species associated with pink to reddish-purple flowers.
- Zantedeschia albomaculata: Known for spotted leaves and typically white to cream-colored spathes.
- ‘Green Goddess’: A white-flowering cultivar with prominent green markings on its spathes.
- ‘Picasso’: A popular cultivar with a deep purple center and a pale outer edge.
Fun Facts
- Calla lilies are not true lilies; they belong to the arum family, Araceae.
- The showy “flower” is a modified leaf called a spathe. The tiny flowers grow on the central spadix.
- Calla lilies are native to southern Africa.
- They are used in both wedding and funeral arrangements.
- All parts contain irritating calcium oxalate crystals and are toxic if chewed by people or pets.
Notice an error or have a question about Calla Lily? Contact us